
How do we improve our team from home? Record your own classes!
On occasion, I have recorded my own classes for my teammates on effective communication. I had a lot of fun learning how to do it and was pleasantly surprised by how easy it was to do with a modern laptop in your home. You can get fancy and purchase all kinds of high-end recording equipment, but it shocked me how great my video came out with my laptop’s built-in equipment. I want to walk you through the process I figured out in the hopes it can help you more effectively reach out to your team and continue to build and develop them, despite your teleworking challenges.
Location, location, location!
If you read my post, Teleworking is Hard, you’ll recognize the importance of setting boundaries to any teleworking setup. While you may be able to mute yourself or momentarily turn off your camera during a video teleconference (VTC), there’s no opportunity to do that when you’re the focus. Make sure that when you plan to record, you’re not in a high-traffic location in your home and that your family understands your need to be alone. You also want to make sure that you can pick a location (and time of day) where the ambient noise will be low enough not to be picked up by your mic. Having a phone ring or a baby cry in the middle of your recording will throw off your rhythm and possibly force you to start over.
Lights, Camera, Action!
Lighting is surprisingly important. It allows you to convey your tone through your nonverbal signals, which are more necessary than many appreciate. We see examples of how lighting can negatively impact communication all the time with VTCs: folks that sit in front of a window with light pouring behind them, making it impossible to see them. Other times, folks sit in a room that doesn’t have enough light, resulting in a picture that looks muddled and flat.
While the profession of lighting (and equipment) can get very involved, one essential rule is to make sure that you have soft light in front of you and a darker stage behind you. This keeps the focus on you as the presenter and minimizes distraction. I’ve got two main areas in my house that I record as a result: one is at my kitchen counter, where I’ve got multiple soft LED light sources in front of me, and I can easily keep the lights to my rear dimmed. The other is the one featured in my posted videos: my desk, where I’ve got a small LED reading lamp pointed at the wall. Reflecting the light helps soften it and keep it from glaring or blinding me. It’s a cheap way of getting closer to those fancy light/umbrella setups you may have seen in a photography studio. As streaming video production has picked up in popularity, you can find all sorts of relatively inexpensive lighting solutions online.
Slides and Software
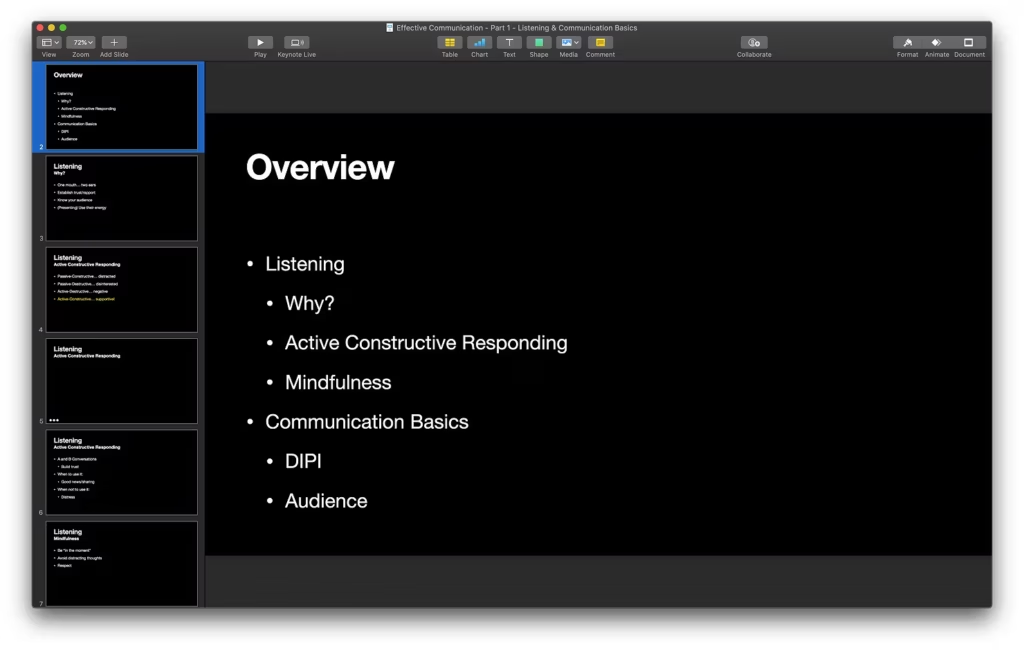
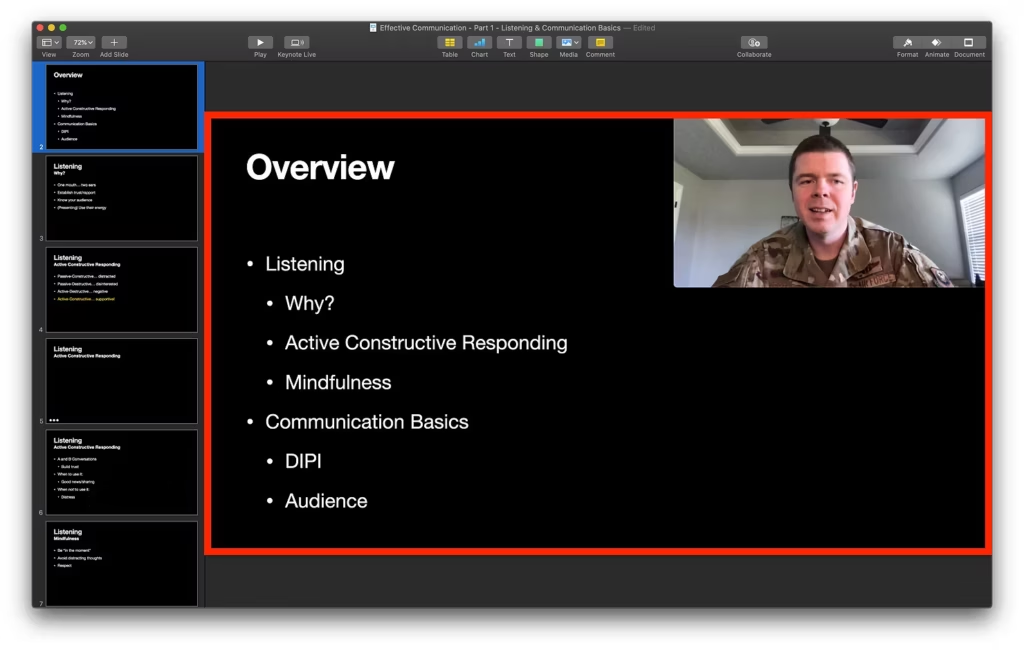
This is where it gets very Mac-specific. I’m sure there are similar options for a Windows PC, but I have zero experience with them. Start by opening up your slides. I used Keynote, but just about any presentation software should do. Expand the thumbnail section (that’s usually on the left) to be just large enough to be somewhat legible. Doing so will help you with your transitions because you’ll be able to see what’s next with just a glance.
Next, open up quickTime Player and cancel the Open File box that automatically pops up. Select File and New Movie Recording.

This will turn on your camera and give you a resizable video feed of yourself. Do not tell it to begin recording! Resize it to whatever size you would like, keeping in mind that it may interfere with your slide text.
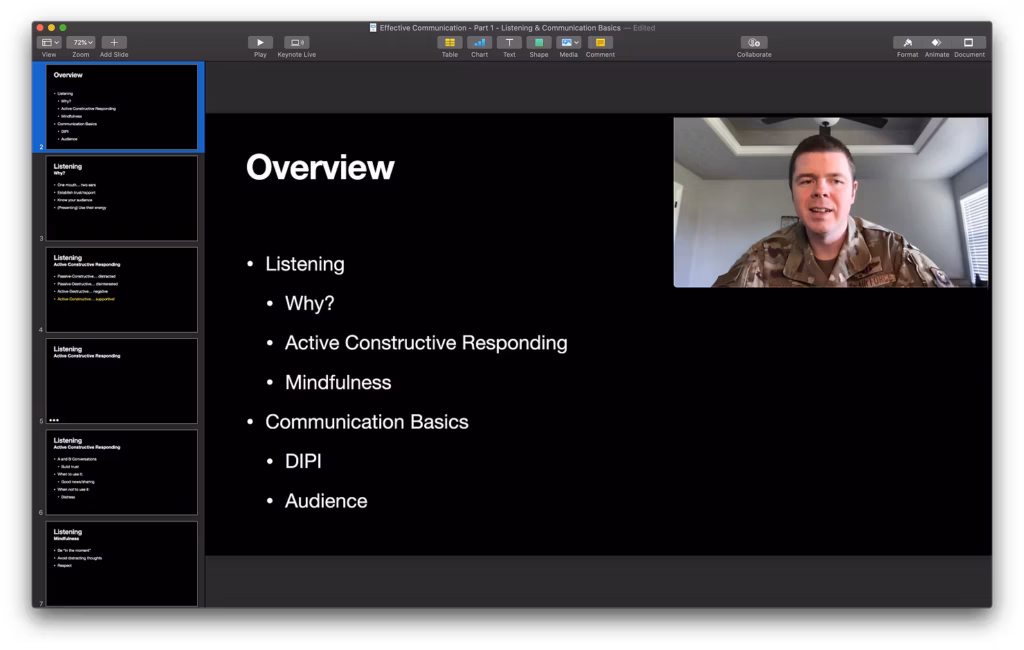
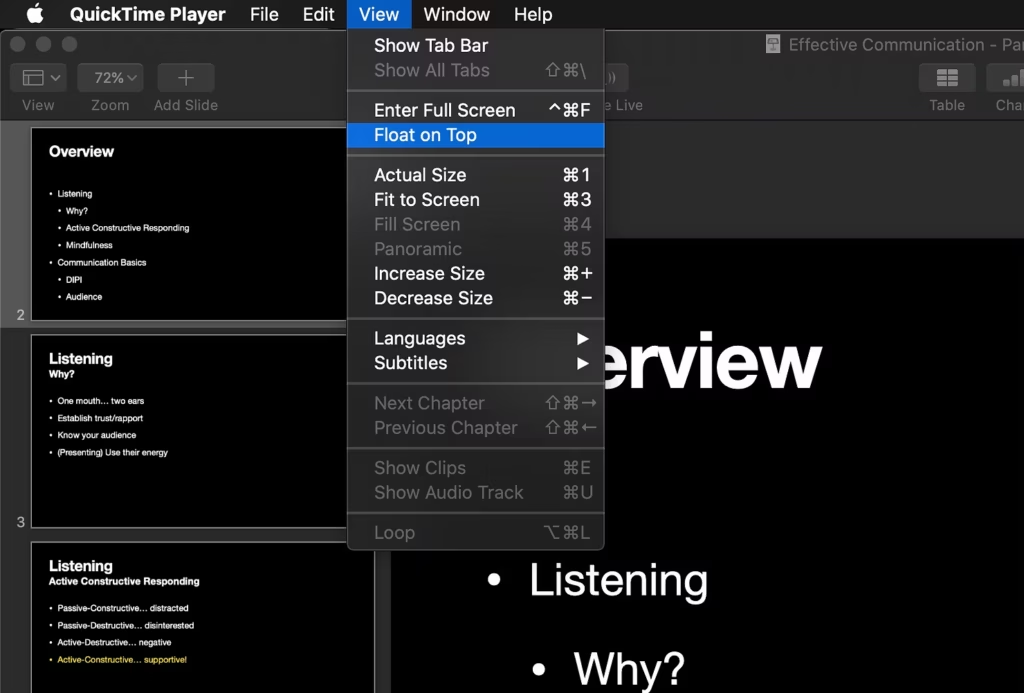
Next, return to the quickTime Player menu and select View, then Float on Top. This will ensure that your video feed stays on top while you control your slides.
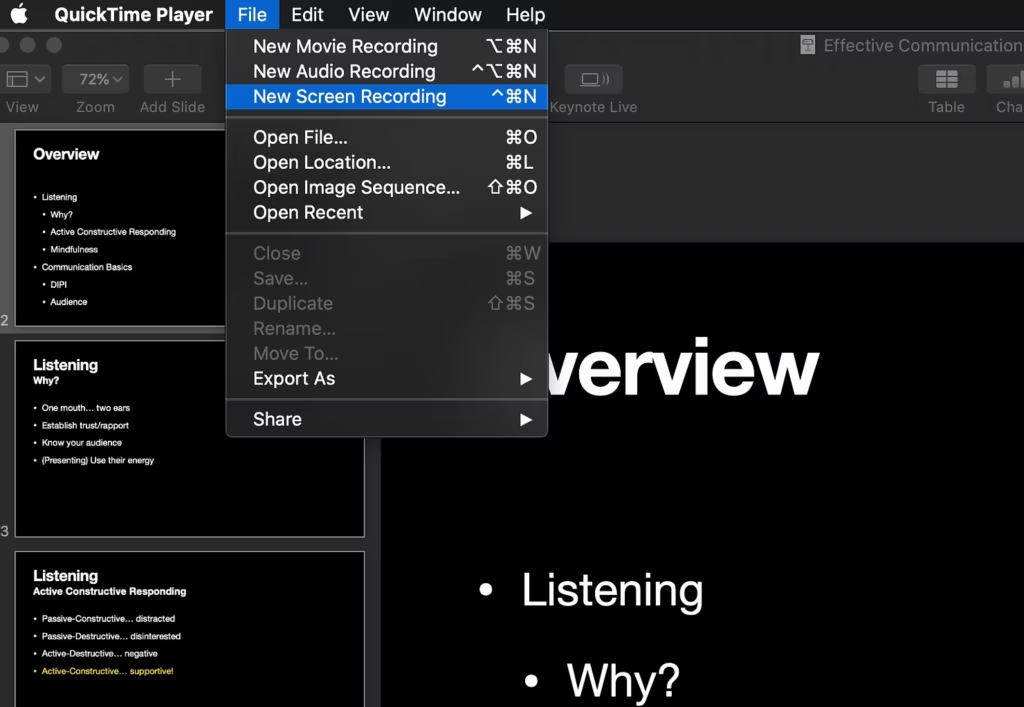
Finally, go back once more to the quickTime Player menu and select File, then New Screen Recording. You’ll see a menu bar appear at the bottom. Make sure you check the Options area and ensure that you’ve got your desired microphone checked. It defaults to None, making for a pretty quiet video.
Finally, select Record Selected Portion, and draw a box around just the portion of the slide and the video feed that you want to record. Once you’re ready to begin, just hit the Record button and go! You should be able to flip through your sides by keeping the cursor out of the camera, selecting the thumbnail area, and using your keyboard to move forward and back. Once you finish, there should be a new stop button that has appeared in the top right area of your menu bar. Press it, and you’ll see your shiny new recording automatically pop up in quickTime Player.
Compression
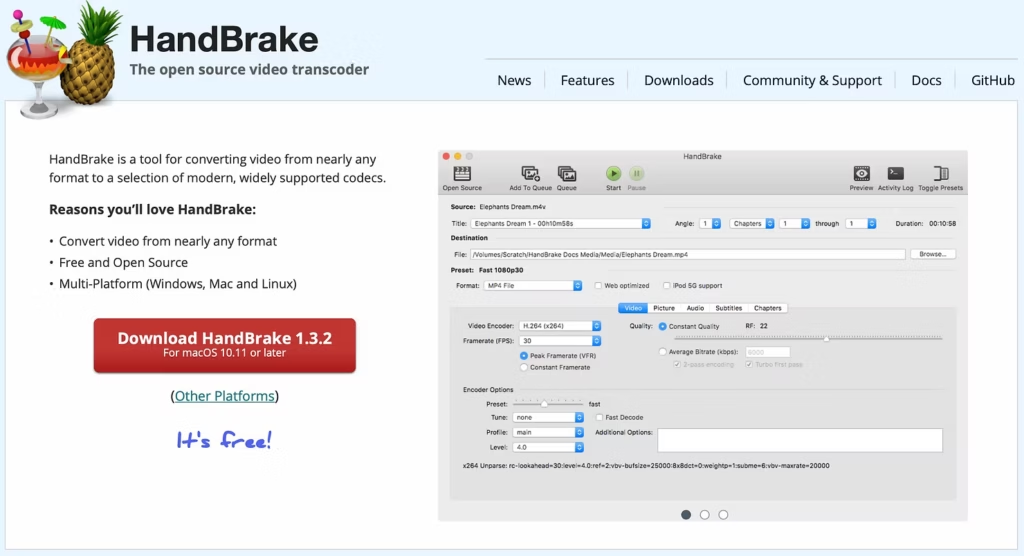
One last step before you upload and share is to compress your file. You will likely notice that your final recording takes up a massive amount of hard drive space, usually several gigabytes. Fortunately, the open-source community writes and develops an fantastic free tool called Handbrake.
It’s powerful and has tons of options, but don’t let that intimidate you. Just open up your recording, and the only option you want to check is Web Optimized under the Format area of the bottom panel. Hit the big green Start button and grab a coffee. Depending on your computer’s processing power, this can take a while. Eventually, you’ll be have a file that will have little noticeable loss in quality while taking up substantially less hard drive space. As an example, my first 25-minute recording dropped from 6.3GB to an astonishing 166MB; it took up just 2% of the original hard disk space. Uploading to a reputable streaming service will often incur another layer of compression while allowing users to watch it as it downloads.
Conclusion
That finishes up my short primer on how to create your own classes to keep on developing your organizations. My closing advice is this: you will mess up. There will be moments where it’s not perfect. That’s okay. Don’t be too hard on yourself, learn from the experience, and see if you can do better next time! Better an “okay” course produced and distributed today than the perfect one that never gets produced. If you decide to get really serious about this, you can always add some editing software into the mix! Let me know if you found this article helpful and please share with me the videos you use this to create!