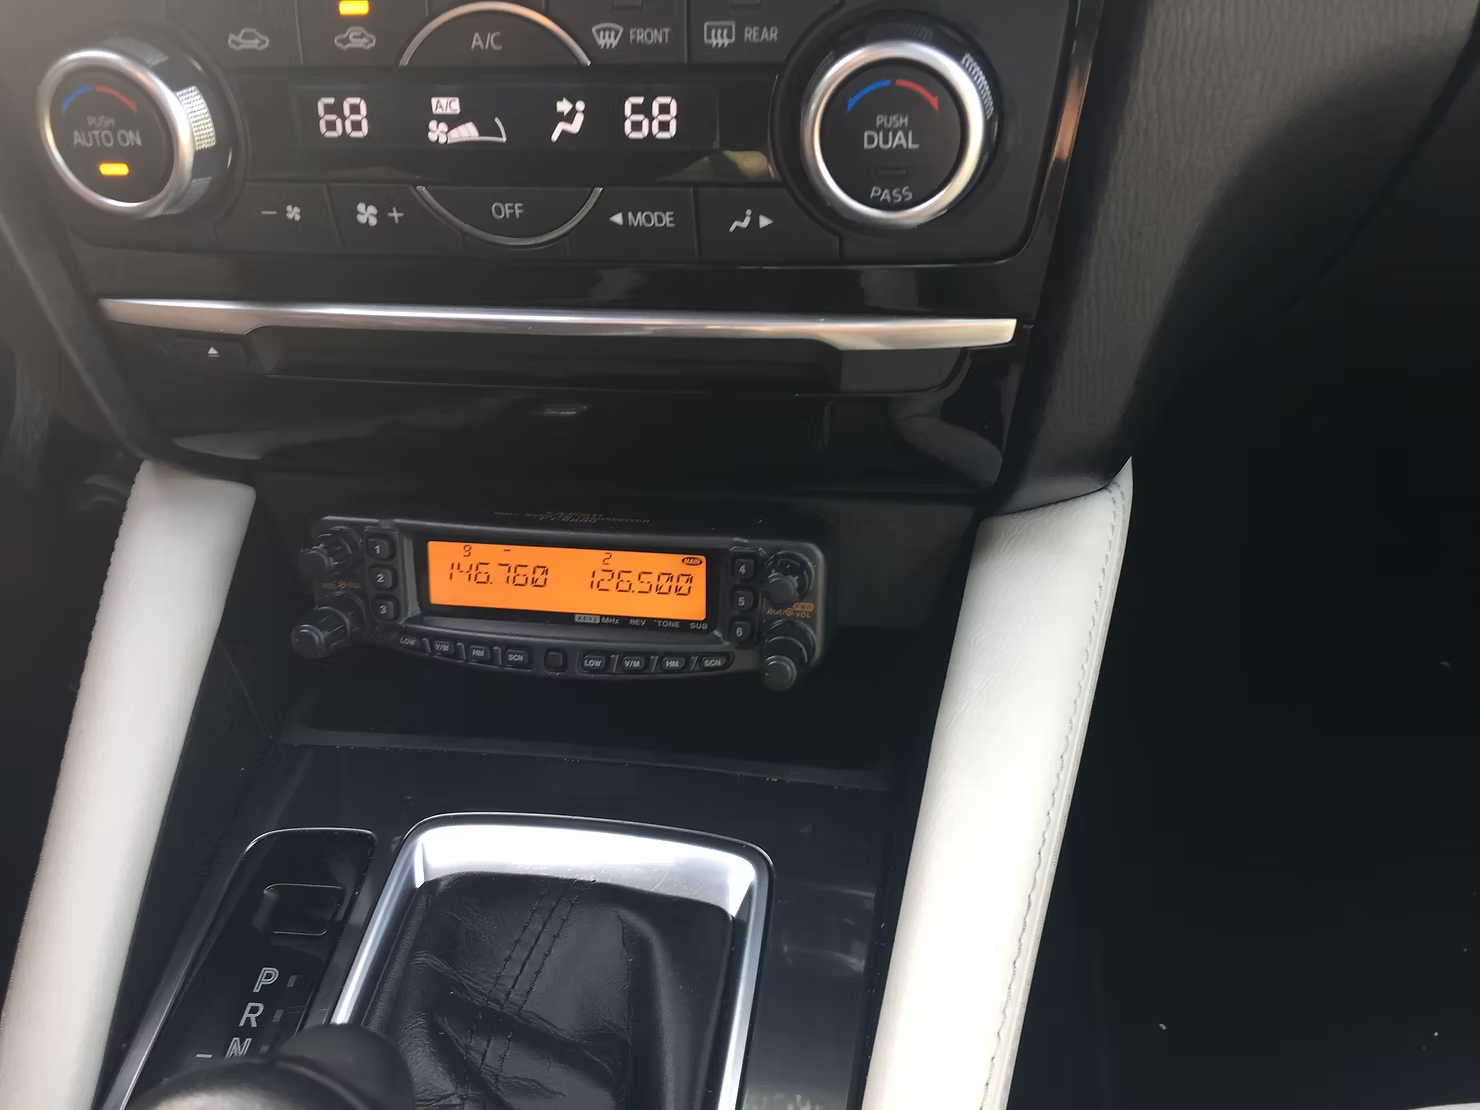
Amateur radio installations are the core of every good family sedan, right?
So last June I decided that my MINI Cooper S needed another radio, however within the last few months my MINI and I decided to have a breakup. Sad, I know, but the family was starting to outgrow the backseat of our family Volkswagen GTI and I was starting to outgrow the MINI’s repair bills. Additionally, my current commute no longer really appreciated the joys normally associated with a manual transmission, so I moved on to a fantastic 2016 Mazda 6 (because why buy new?) which is still quite fun, super-comfortable, and gets *better* mileage. That said, the Mazda(like the MINI before it) needs another radio. Enter my de-commissioned MINI’s Yaesu FT-8800 and Larsen dual-band antenna.
This project was comparably simple and I was able to re-use a *lot* of my parts. Additionally, I was even more fearless regarding ripping up panels and drilling holes. Also, as much as I love hatchbacks, a clean ham radio installation is much easier on a sedan. The only thing I needed to buy was a new antenna mount. I ended up going with a cheap Tram-Browning NMO trunk mount and using zip-ties to attach the feedline to the trunk lid bracket. All of the cables slid neatly under the appropriate interior panels without any issue.

As with the MINI, I remoted the face plate and mounted the radio body in the trunk. I ended up drilling into the brace behind the seats, keeping the radio conveniently out of the way (even when I drop the seats for cargo) and still letting it get plenty of airflow. The power, speaker, and remoting cable all tuck nicely out of the way before they head forward.

The trickiest part was figuring out where to mount the face plate. The interior of the Mazda 6 doesn’t have a lot of empty space where I can cleanly (and safely) mount anything. Ultimately, I settled on the cubby in front of the transmissions shifter. Cutting up a 1×2 with a miter saw, I built up a small dashboard extension along with some rear bracing. Then, I sprayed the whole thing with multiple coats of PlastiDip to give it a nice durable matte finish with some skid resistance. Finally, I cut down a rubber door stop and wedged it underneath to hold it firm without requiring additional drilling. That also makes it fairly easy to remove should the need arise. There’s even still room to slide a phone in there if needed, though the 12-volt accessory outlet is blocked. As for the mic, I listen much more than I talk, so I usually just leave it detached and stored in the center armrest.

One final clever idea I had was how to mount the speaker. First, I tested it out in the trunk, where it sounded fine while parked with the engine off, but proved way too quiet while driving. Next, I threw it under my seat, similar to where I tossed it in the MINI. Unlike the MINI, I fully expected to regularly carry rear seat passengers, so I couldn’t afford to have it just sliding around on the floor back there. The fix? Velcro. I had some adhesive velcro laying around, so I slapped three strips of the hook side onto the speaker’s back, giving it tons of grip on the carpet. It does not move at all.
Final thoughts:
1. Sedans are way easier to work with than hatchbacks.
2. The signal is even better than the same setup on the MINI.
3. 12 volts hurts a lot and makes your wrench really hot.


